Playing virtual instruments live: a keyboard setup guide
Originally published on jonatascastro.com. English edition translated and revised 01 Oct 2026. Historical examples are identified in the text.
I started exploring computer-based keyboard sounds around 2009, when I owned a Roland Fantom FA-76 and was becoming interested in music production. A friend from São Paulo introduced me to virtual instruments and samplers, and I gradually tried taking them onto the stage.
It took time to build a setup I liked. The appeal was flexibility: use the keyboard as a controller, choose sounds in software, and shape the performance without relying entirely on one instrument's internal sound engine.
The basic signal path
A minimal setup has three parts:
- Keyboard: sends MIDI performance information.
- Computer: runs a host and the virtual instruments.
- Audio interface: sends the resulting audio to headphones, speakers, or the venue's sound system.
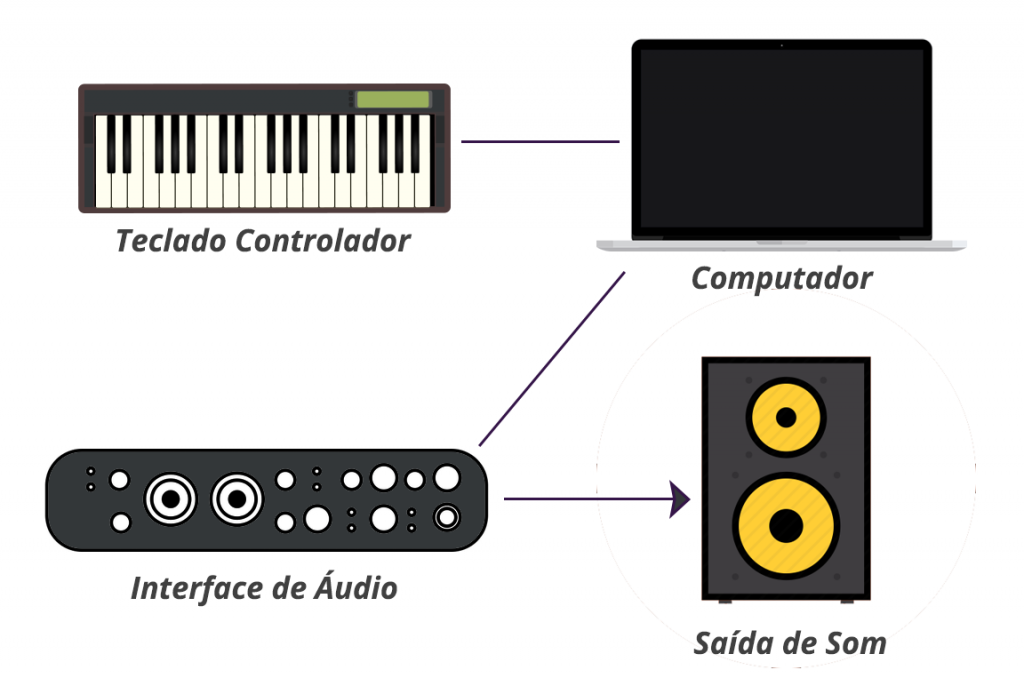
The original diagram is in Portuguese. The keyboard sends MIDI to the computer; the interface carries the audio onward.
A conventional keyboard contains its own sound-processing hardware and audio outputs. In this setup, you separate those functions across several devices.
Choose a keyboard that suits your hands
You do not necessarily need a dedicated MIDI controller. Another keyboard can work if it has a compatible MIDI or USB output.
A USB connection may let you connect directly to the computer. A conventional MIDI output may need a MIDI interface, sometimes built into an audio interface. Some controllers also receive power through USB.
Useful features include:
- Comfortable, velocity-sensitive keys.
- Sustain and expression-pedal inputs.
- Pitch-bend and modulation controls.
- Knobs or faders for the parameters you need during a performance.
- Aftertouch if your sounds and playing style make use of it.
The original article showed M-Audio Oxygen 61 V4, Axiom 61 MKII, Keystation 61 II, and Waldman Krypton 61 controllers. These illustrate the options I was considering in 2016, rather than current purchase recommendations.
For a broader comparison, see the keyboard categories guide.
Choose the computer around the actual project
An expensive computer is not automatically a reliable live instrument. Test the host, plugins, and libraries you intend to use together.
Pay attention to:
- Enough processing capacity for the instruments and effects.
- Memory for loaded sample libraries.
- Storage capacity and loading speed.
- Compatible ports, drivers, and operating-system versions.
- Stable power and cooling during the performance.
The original minimum suggestion—Core i5, 4 GB RAM, and a 500 GB drive—was a 2016 example. It is not a useful universal requirement for today's software. Check the current requirements of the specific host and instruments, then test a realistic set.
A Mac is not mandatory. What matters is a compatible, stable combination of hardware and software that you have rehearsed with.
Understand the software layers
Audio driver
The driver lets your software communicate with the audio device. Use the interface manufacturer's supported driver where one is required, and confirm compatibility before changing the operating system.
Host or DAW
The host organizes instruments, effects, MIDI routing, and audio outputs. For live work, look for practical ways to switch sounds, arrange a set, map controls, and manage transitions.
The original article mentioned Brainspawn Forte, Cantabile, Ableton Live, and MainStage. That list records the tools discussed at the time. Check current support, operating-system compatibility, and plugin formats before choosing a host.
Virtual instruments and samplers
A virtual instrument generates or plays sound. A sampler uses recorded samples; other instruments use synthesis. The host must support the plugin's format and version.
The original article mentioned Native Instruments, Steinberg, IK Multimedia, Ample Sound, and Cakewalk as examples of software makers. Choose the sound you need and test how it behaves in your host, rather than collecting instruments simply because they are available.
Use a suitable audio interface
The interface converts the computer's digital audio to an analog signal for your listening system or the venue's mixer. Inputs also let you record external sources when required.
An external interface is often useful for dependable drivers, suitable outputs, and physical level controls. Built-in audio can work in some setups; it still uses an audio interface inside the computer.
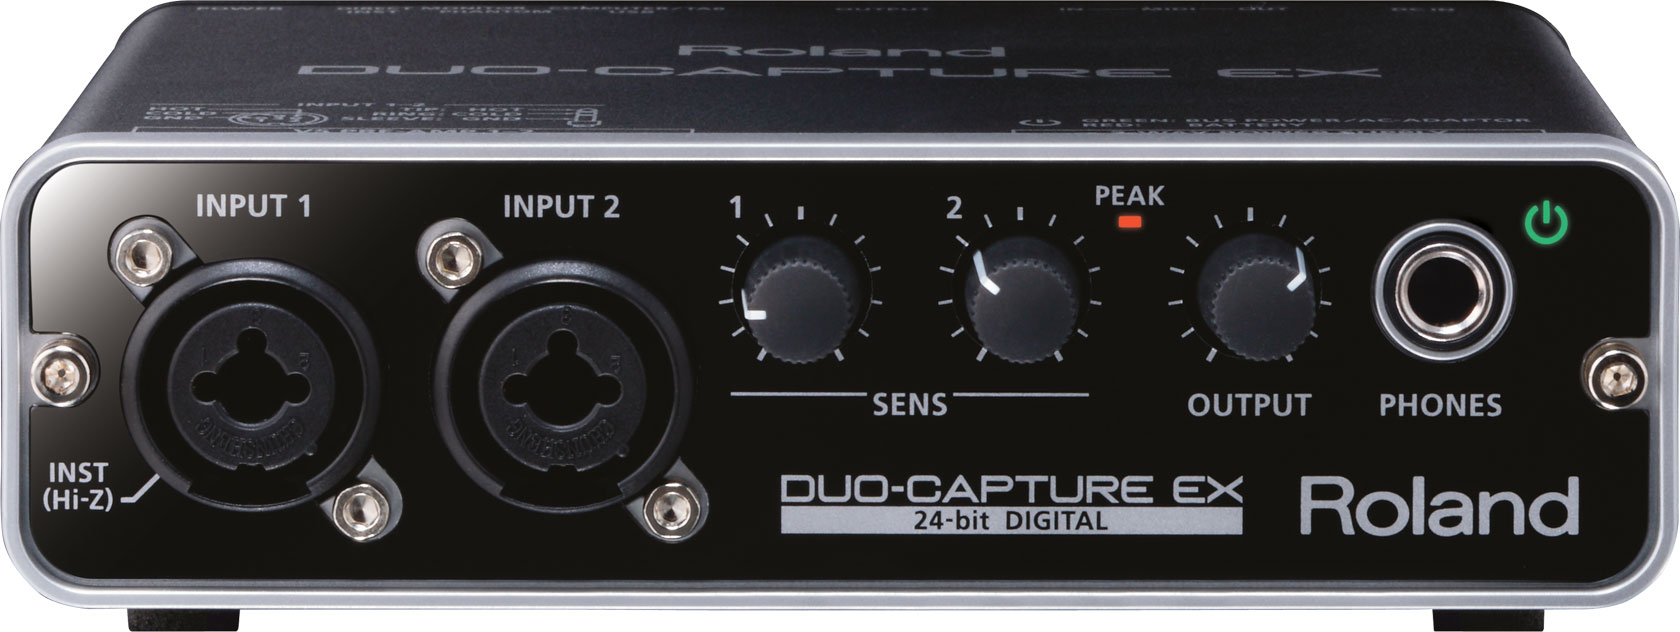
The original post showed the Focusrite Scarlett 2i2, Roland Duo-Capture EX, and PreSonus AudioBox 22VSL. They are historical examples, and their compatibility should be checked individually.
Balance latency and stability
Latency is the delay between playing a note and hearing the result. Audio buffer size, drivers, processing, and the signal path all contribute to it.
A smaller buffer can reduce delay but gives the computer less time to process audio. If it cannot keep up, you may hear clicks, pops, or dropouts. A larger buffer gives more headroom but increases the delay.
Do not chase a fixed number at the expense of a stable performance. The original “below 5 ms” suggestion was a preference, not a guarantee that one reported latency figure describes the entire system.
Similarly, a higher sample rate is not automatically a better live setup. It can increase the processing load. Choose settings your interface and project support, then test them under realistic conditions.
Advantages and tradeoffs
A software setup can offer many sounds, flexible routing, and a good way to reuse equipment you already own. It also brings more connections, startup steps, compatibility concerns, and possible failure points.
Polyphony is still limited: plugins may impose voice limits, and the computer has finite processing and memory. The original claim of unlimited polyphony needed that qualification.
The value depends on your needs. There is no guaranteed percentage saving compared with a hardware keyboard.
Seven ways to prepare for a performance
- Keep the system predictable. Use a setup you know, and avoid unnecessary changes immediately before an event.
- Reduce competing work. Close unrelated applications and postpone updates or heavy background tasks that might interrupt the session.
- Organize sample storage. Fast storage can help loading, but also verify that every library is present and accessible without an unexpected download.
- Rehearse the host workflow. Test patch changes, layers, splits, pedal mappings, and transitions in the actual set.
- Test the complete audio path. Use supported connections and drivers; the interface's USB version alone does not establish its latency or reliability.
- Secure cables and power. Place the computer where it will not be bumped, protect connectors, and check power supplies before playing.
- Make the setup your own—and prepare a fallback. Learn the controls, know how to stop a stuck note, and decide how you will continue if a component fails.
Begin with one playable sound and a reliable connection. Add layers and more complex routing after that foundation works in rehearsal.
For the underlying messages and channels, read MIDI explained. For sound combinations, see five ways to layer keyboard sounds.