MIDI explained: connections, messages, channels, and controls
Originally published on jonatascastro.com. English edition translated and revised 01 Oct 2026. Historical examples are identified in the text.
If you have explored the back panel or settings of a keyboard, you have probably seen MIDI. Understanding it makes it much easier to connect instruments, configure a DAW, and control virtual sounds.
MIDI stands for Musical Instrument Digital Interface. It is a communication protocol: one device sends performance instructions, and another interprets them.
MIDI is not audio. A message can describe a note, a pedal movement, or a change of sound. The receiving instrument produces the audio.
Why learn MIDI?
It helps you:
- Configure and program keyboards.
- Set up MIDI tracks in a DAW.
- Enter notes into notation software.
- Play and control virtual instruments.
- Connect multiple keyboards.
- Use a controller with a sound module.
- Layer sounds across instruments.
- Record a performance as editable notes.
- Configure pedals and other controls.
- Operate other MIDI-compatible equipment.

This introduction describes MIDI 1.0, the protocol discussed in the original article. Newer MIDI capabilities are a separate topic.
Connections and direction
An interface is a way for systems to communicate. A MIDI interface is more than a connector: the device must understand and send or receive MIDI messages.
Common connections include:
- MIDI IN: receives messages.
- MIDI OUT: sends messages.
- MIDI THRU: passes along messages received at IN, when the device provides that function.
- USB MIDI: carries MIDI between compatible devices, often a keyboard and a computer.
For a conventional MIDI cable connection, connect OUT on the sender to IN on the receiver. Two OUT ports or two IN ports do not form that path.
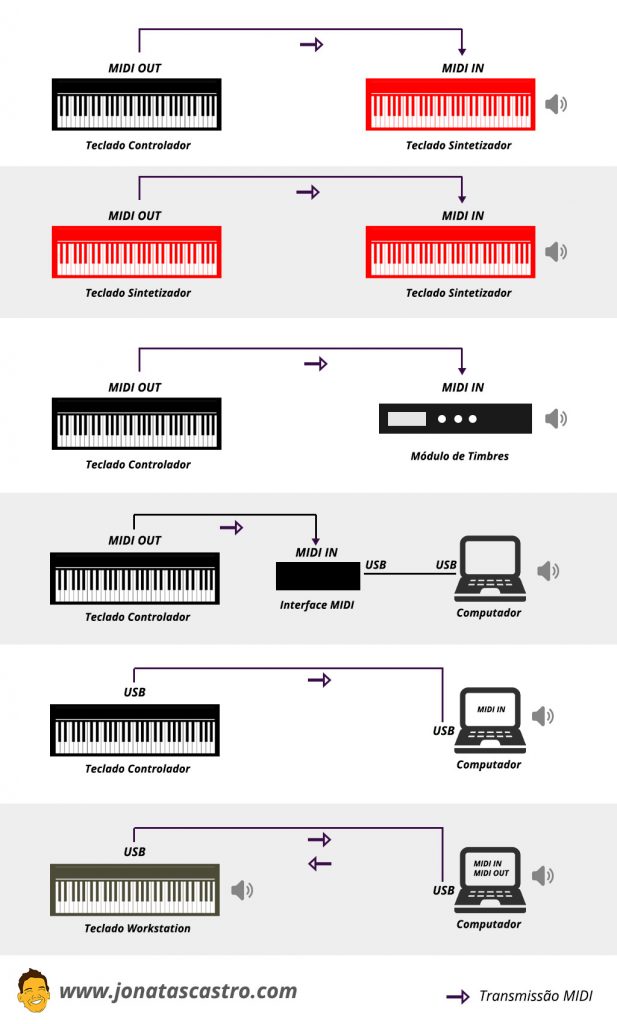
The arrows represent the direction of messages. The original diagram is in Portuguese; transmissão means transmission and recepção means reception.
USB connections depend on device roles and compatibility. A keyboard's USB port does not necessarily let it connect directly to another keyboard; a computer or another compatible USB host may be needed.
Notes and velocity
Note On tells the receiver which note to play and with what velocity. Velocity commonly represents how quickly or forcefully the key was struck, although the sound's response depends on the instrument.
Note Off tells it that the note has been released. The sound may continue through its release envelope or because a sustain pedal is held; the message does not always mean immediate silence.
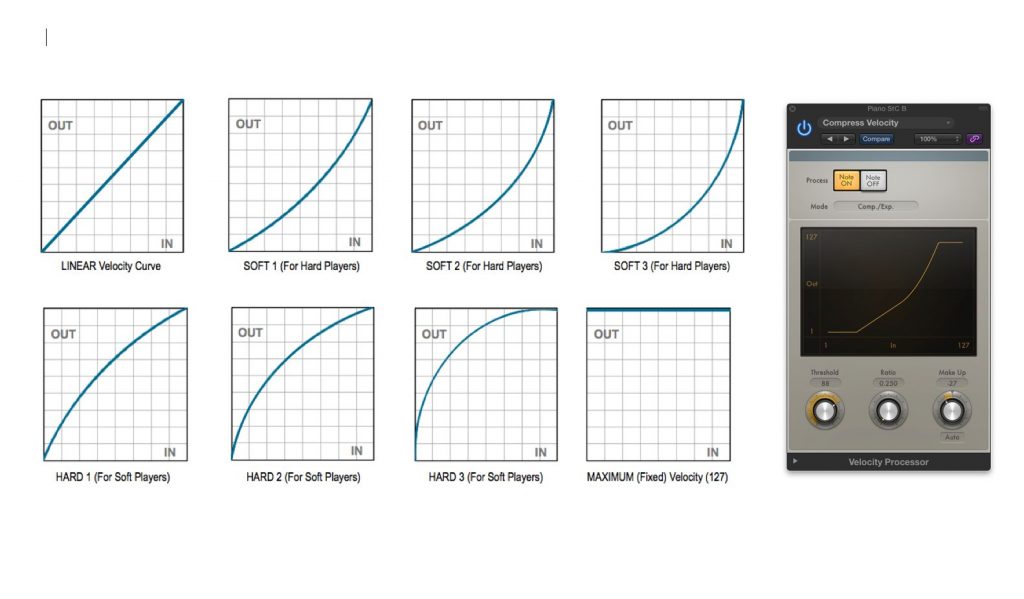
A velocity-sensitive keyboard may offer several response curves. A light curve can make high values easier to reach; a heavier curve may require a stronger touch. Choose the response that lets you control the instrument comfortably.
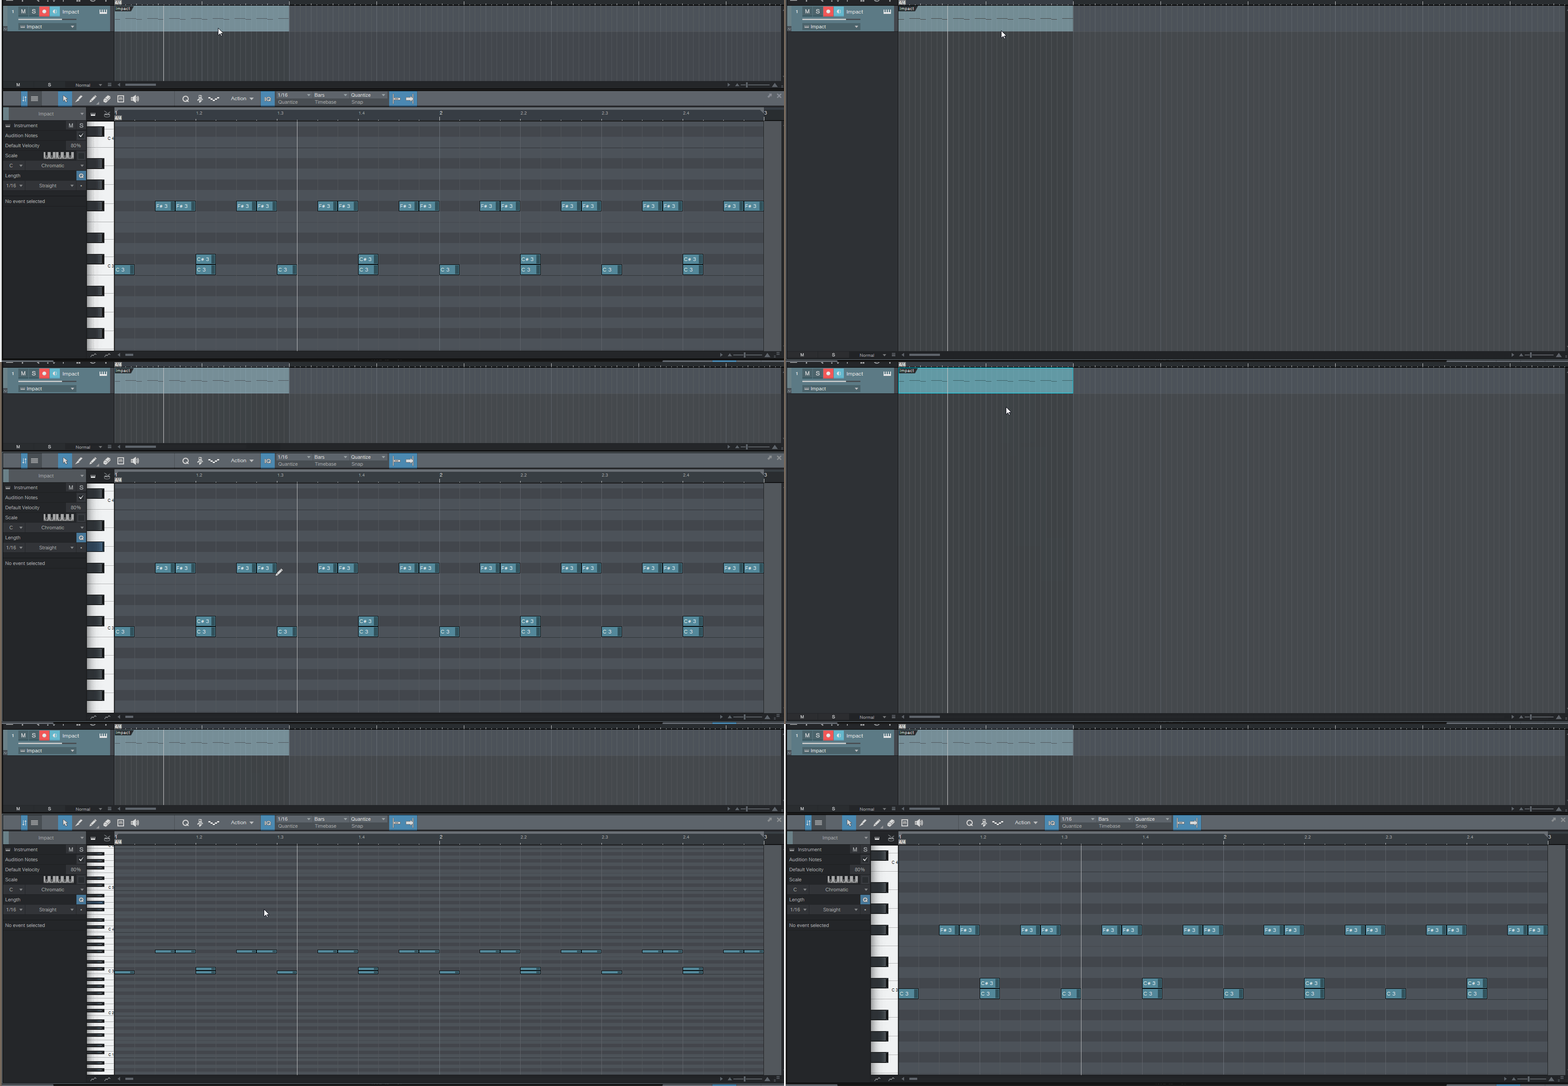
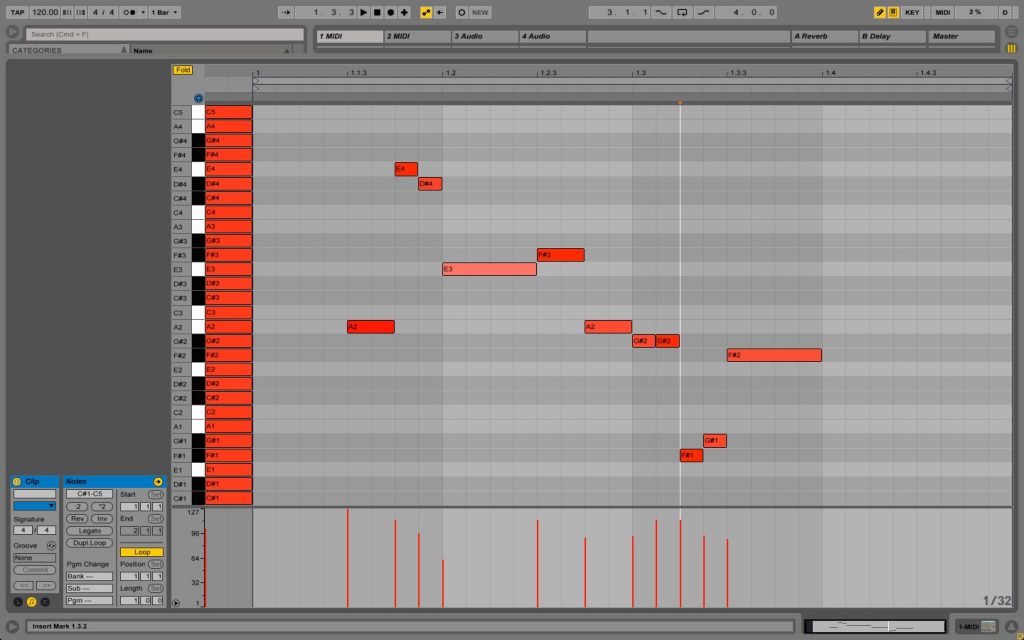
In a DAW's piano roll, a note's horizontal position shows its timing and its length shows its duration. A velocity lane lets you edit the performance's dynamics.
Pressure and pitch bend
Aftertouch describes pressure applied after the initial key press. An instrument can use it for vibrato, brightness, or another expressive parameter. The controller and receiving instrument must support it.
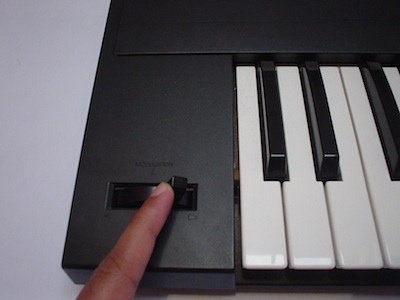
Pitch bend changes pitch continuously, often through a wheel or lever. The receiving instrument determines how far the bend moves the sound.
The original post incorrectly described MIDI 1.0 pitch bend as a 0–127 value centered at 64. It is a 14-bit value from 0 to 16,383, centered at 8,192. This is separate from the usual seven-bit control values. See the MIDI Association's message summary.
Control Change messages
Control Change, usually written CC, lets you send values for numbered controls. Common examples include:
- CC1: modulation.
- CC7: channel volume.
- CC11: expression.
- CC64: sustain pedal.
What a control does in a particular patch depends on the instrument's implementation. Some controls have standard assignments, while others may be mapped freely.
Use the MIDI control reference for more numbers and their conventional meanings.
Many virtual instruments provide a MIDI Learn command. Select the parameter, enable learning, and move the desired knob, fader, or pedal. The instrument can then associate the incoming message with that parameter.
Match the MIDI channels
MIDI 1.0 provides 16 channels per port. Channels let different instruments receive different parts of a performance.
You could send piano on channel 1, strings on channel 2, and a drum part on channel 10. The sender's channel and receiver's settings must match unless your software deliberately remaps them.
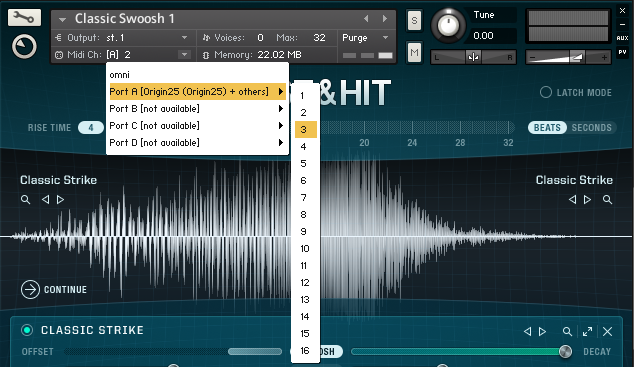
A host can distribute one incoming channel to several instruments. That is one way to create a piano-and-pad layer. It can also keep two keyboards separate by treating their ports and channels independently.
The original article illustrated a single keyboard feeding multiple instruments, then two keyboards with different routing rules:
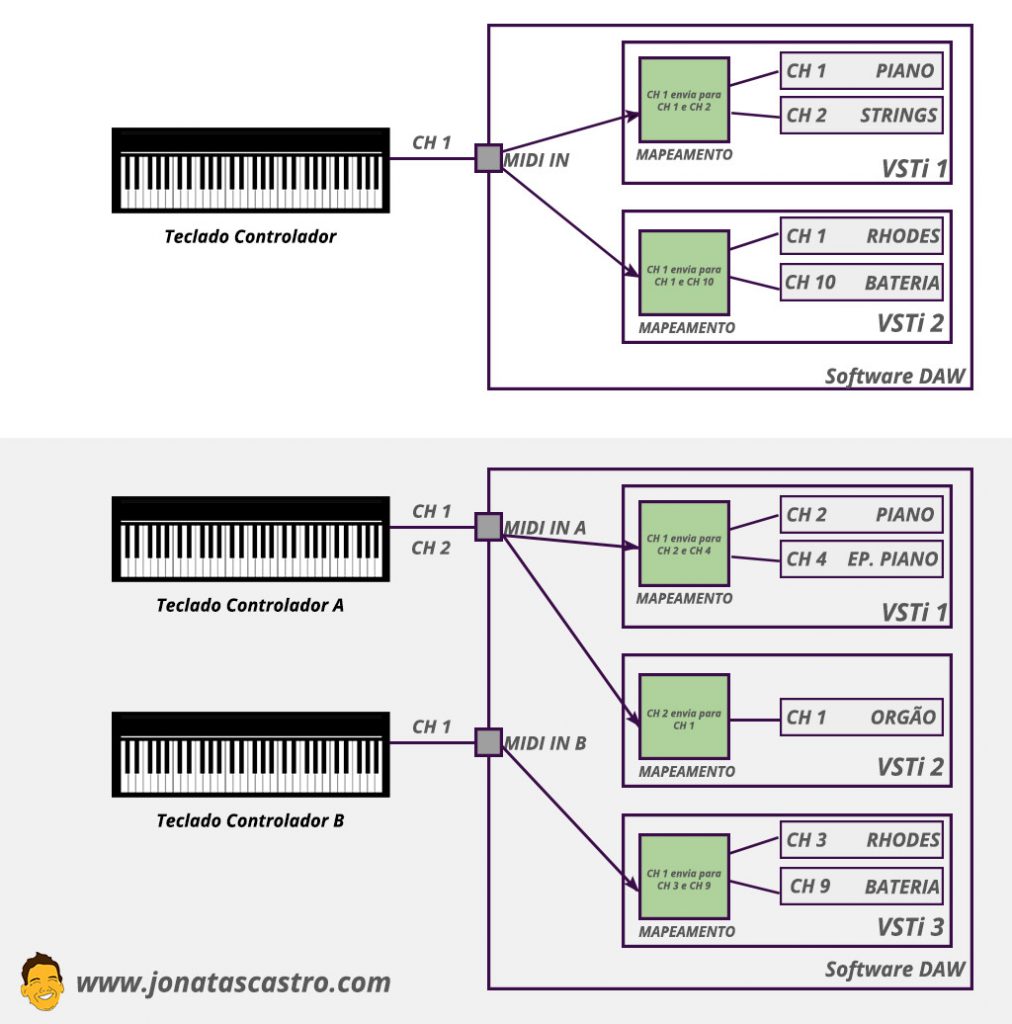
The diagram labels are retained in Portuguese. “Teclado” means keyboard; “canal” means channel.
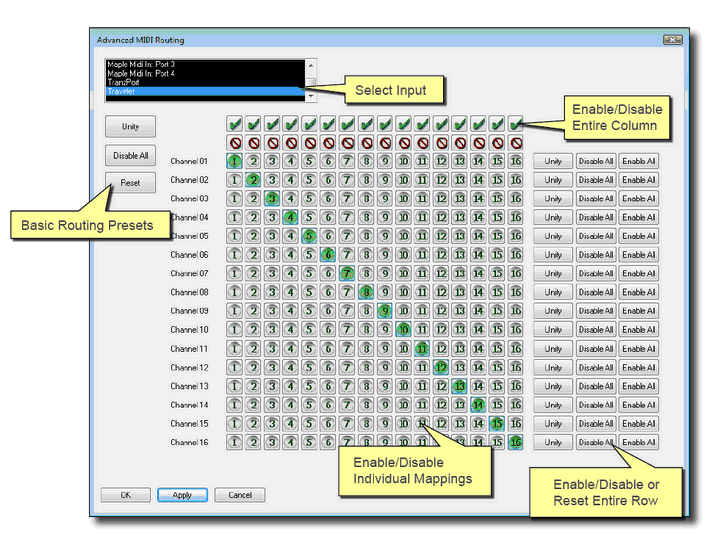
For more examples, see five ways to layer keyboard sounds.
Five practical programming tips
1. Explore different controllers
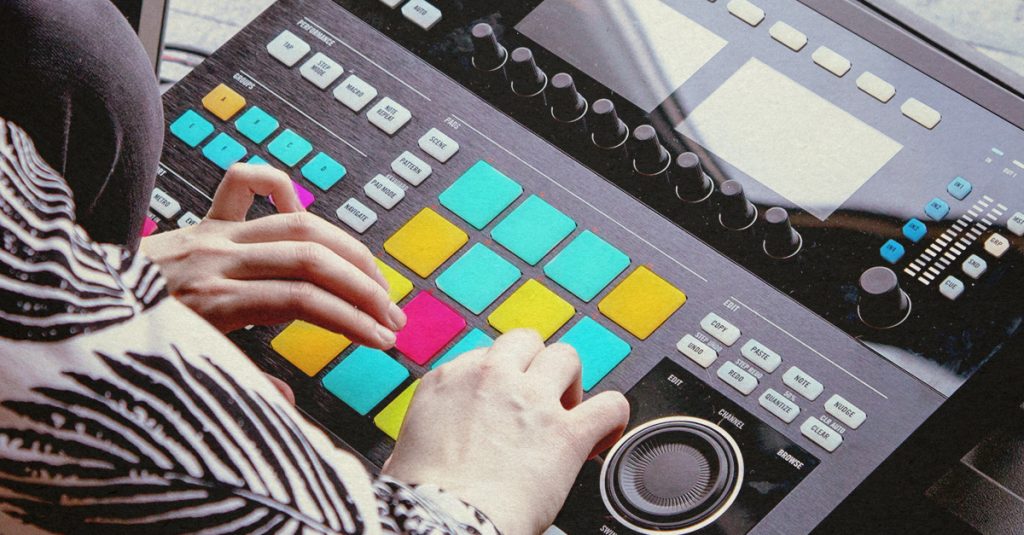
Keyboards are only one option. Pads, electronic drums, pedals, and other controllers can send different kinds of performance information.
2. Use MIDI processors thoughtfully
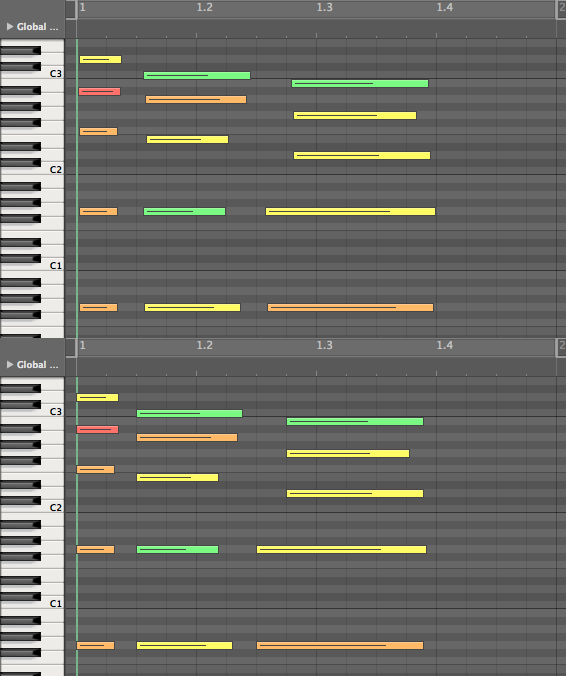
Quantization adjusts note timing. Velocity processors change the distribution of note velocities. Try them on a copy of the performance and listen to whether the result still has the feel you want.
3. Know the Panic command
A stuck note can occur when a receiver misses a release message or a connection is interrupted. Many hosts provide a Panic or reset control. Learn where it is before performing live; implementations vary, so test what it actually resets.
4. Adjust the velocity curve
A patch can respond very differently across its velocity range. Try the keyboard's touch settings before concluding that a virtual piano or other instrument sounds unconvincing.
5. Look for keyswitches
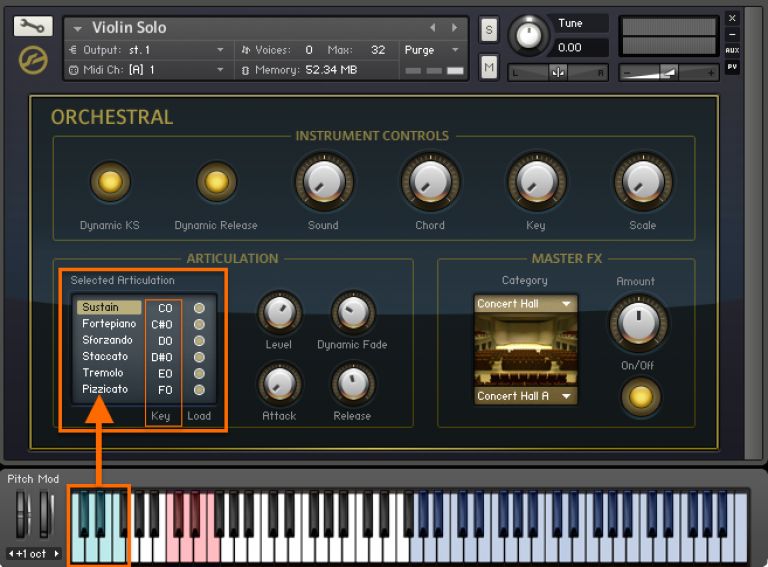
Some sampled instruments reserve notes for changing articulations. Those notes might select a bowed, plucked, or legato technique rather than play a normal sound.
Check the library's documentation and keep the keyswitch range in mind when transposing or layering tracks.
Start with one controller and one instrument. Once notes, pedals, and channels behave as expected, add the more complex routing.